Your cart is currently empty!
How to make dental impressions
1: Begin with the essentials
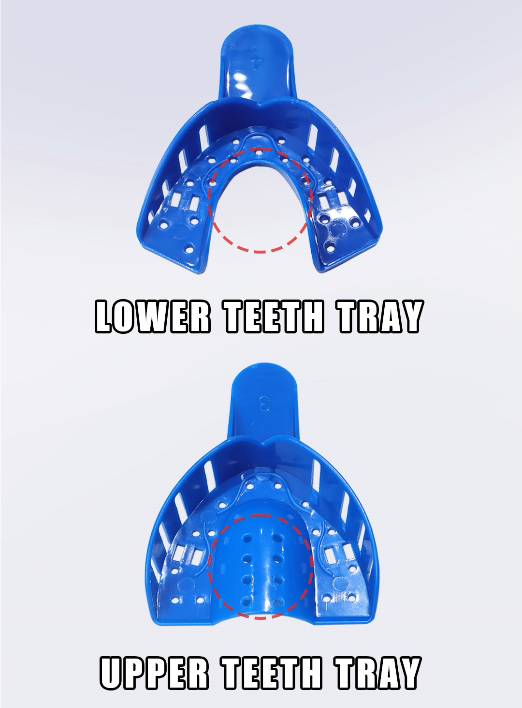
Trays: Ensure you have the correct-sized tray for the upper and lower arches.
- Timer: Use a timer to monitor impression time for precise results. (Whole process from mix material and finish it around 3-4mins)
- Putty: Keep the putty cans within reach, but wait to mix them.
- Gloves: Maintain cleanliness and prevent contamination by wearing gloves.
2: Prepare before you begin
- Thoroughly wash your hands to ensure cleanliness.
- Brush and floss between your teeth for optimal impressions.
- Check that your trays fit perfectly for a comfortable experience.
3: A good impression
- Properly mix the putty: Achieve a uniform color by quickly and efficiently mixing the blue and white putties.
- Use different putty for each impression: Ensure accuracy by applying equal pressure around teeth and gums.
- Not move tray: Once put tray into mouth and keep it steady, not move it.
- Imprint the molars and gum line: Avoid redoing impressions and achieve a seamless aligner fitting experience.
4: Let’s begin
- Separate the trays for upper and lower arches, starting with the upper teeth impressions.
- Mixing and molding: Wear gloves and combine the white and blue putties until they form one hue.
- Give it 60 seconds:
- Mix the putties until a uniform color is achieved.
- Form a 4-inch long, uniform putty cylinder by rolling it between your palms.
- Fill the tray’s U-shaped space with the extended putty form.
- Imprint the molars and gum line: Avoid redoing impressions
- Place the putty in your mouth and don’t move again.
- Hold the putty steady for 3 minutes, ensuring a precise impression.
- Gently remove the putty, wiping away any residue with a clean towel.
- Repeat the process for upper teeth impressions and twice for the bottom teeth, creating a total of four samples.
- Smile for the pictures:
- Use the cheek retractor to separate your lips.
- Take close-up photos of your teeth and gums from different angles.
- Ensure proper lighting or use your phone’s flash for better visibility.
- Take photos of your front teeth, right and left sides, lower molars, and upper molars.
- It better to get 2 sets of teeth molds in case there is one that can’t be used
5: how to pack and ship back to us
Take picture of different angles of mold, or the video below, it better to ship 2 sets of mold to us together in case there is which one can’t be use
(Our principle is to see each tooth from a different angle)When we confirm it’s ok, and you can pack it well with small package, not use the kits box we sent to you.
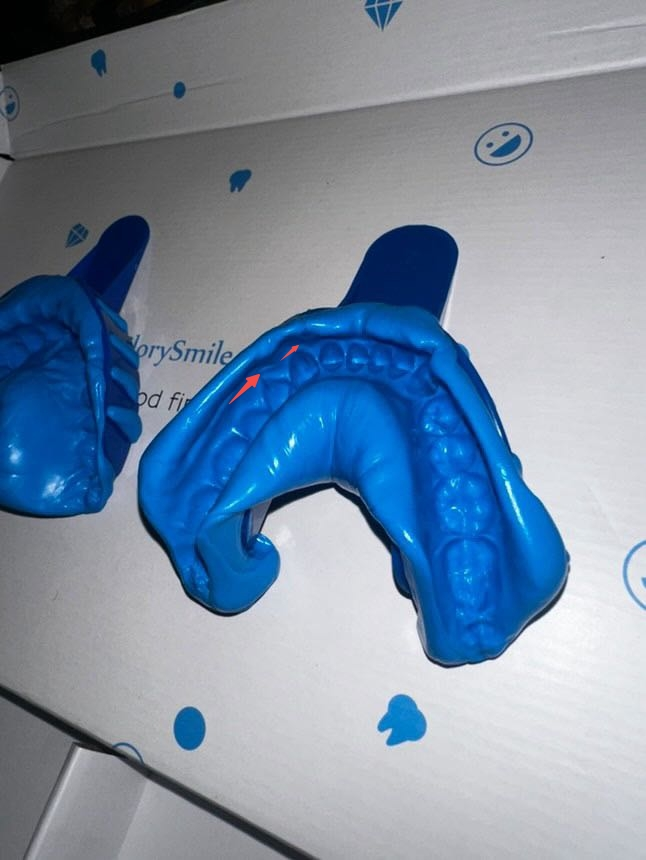
6: how to check if the mold can be use or not when you do the first time
Like the one is perfect, and when you confirm it’s ok like this, just continue do the next one as well. After finishing both top and bottom, you can take these out of tray carefully and not break them. And use the rest of the material to do the other set. Totally need to ship 2 sets for us in case there is one can’t use
1: we can see each tooth clearly and continuously visible, no breaks

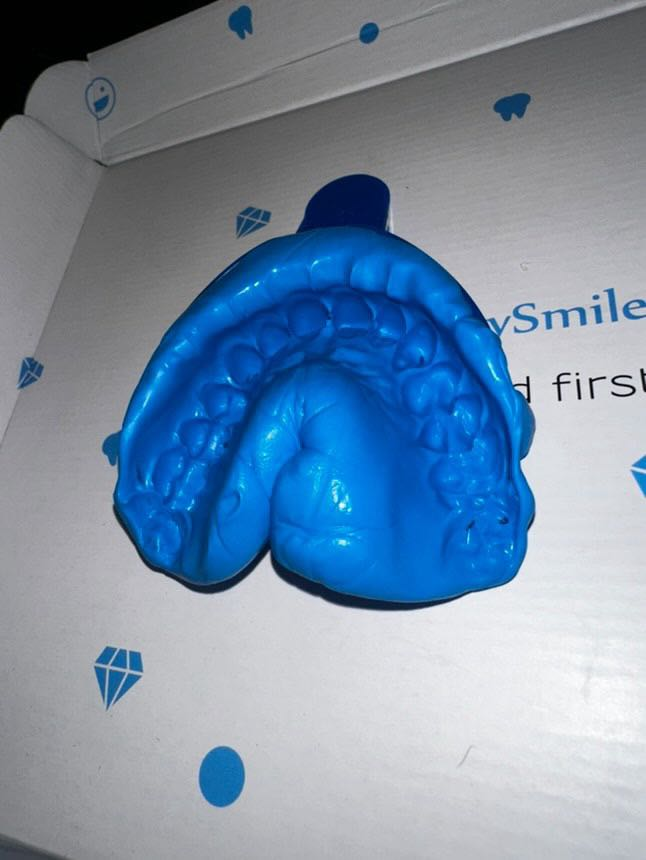
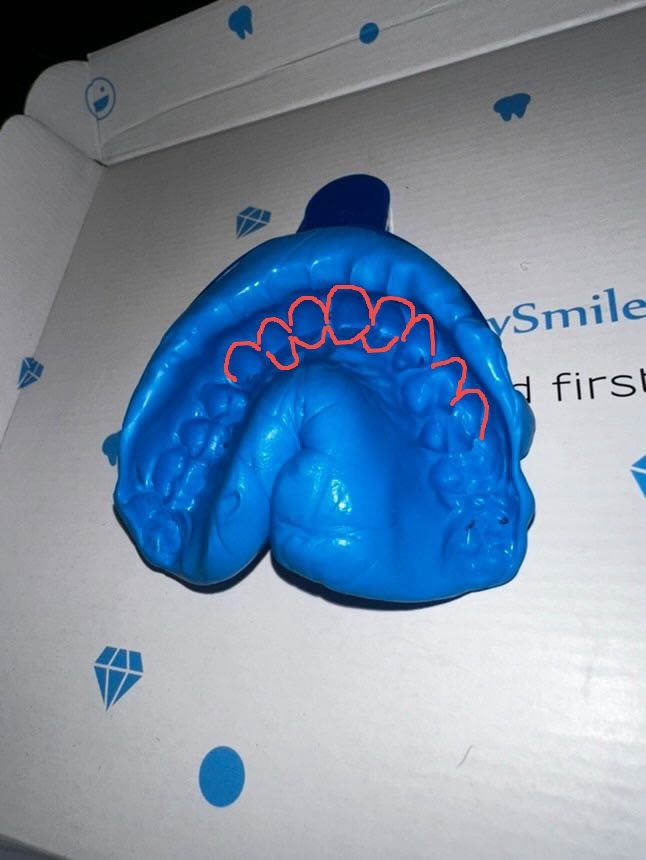
2:The tooth surface is smooth without cracks and no accumulated points or protrusions.


3. There are clear squeeze marks on the gum surface

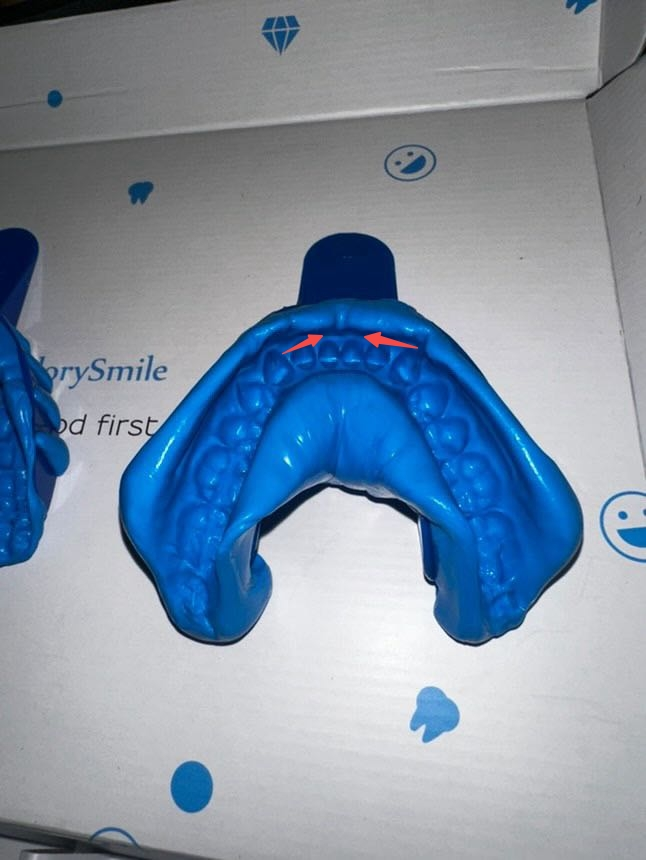
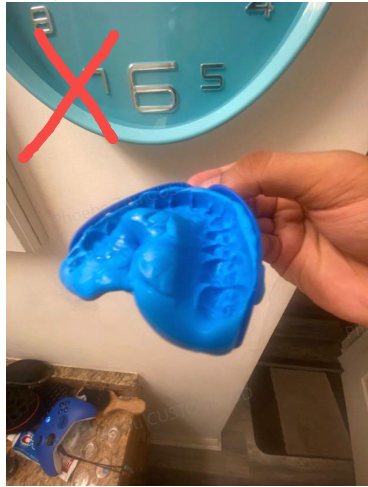
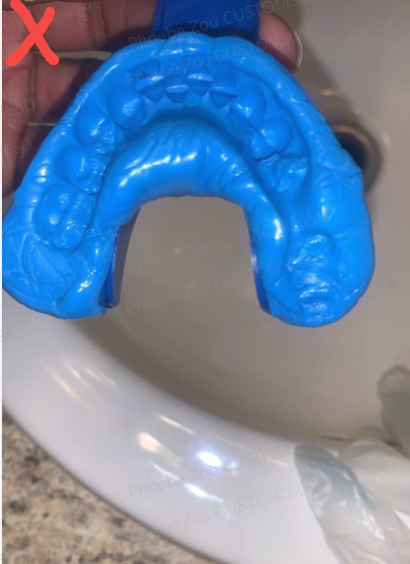
What’s the problem with those molds that can’t be used?
Case 1: When biting, it was placed too far in, and biting too far to the side, making it impossible to obtain a complete tooth model.
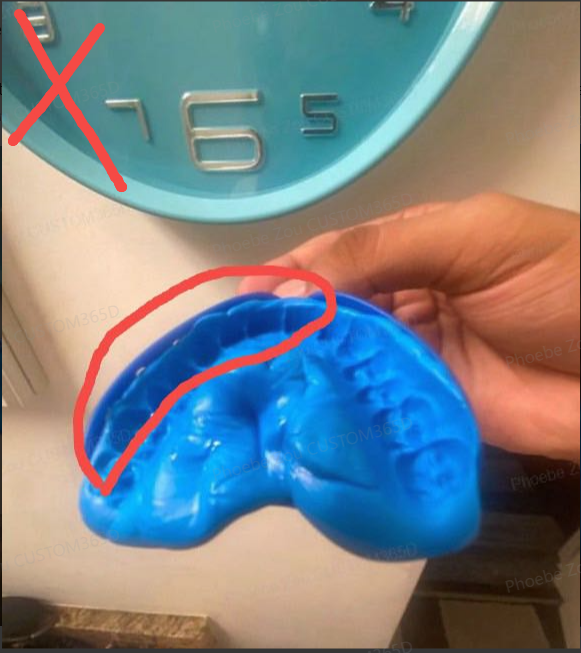
Case 2: Complete bite collapse. When biting, the material needs to be spread flat to every corner of the dental tray, and at the same time, it cannot be placed too far inside the mouth.
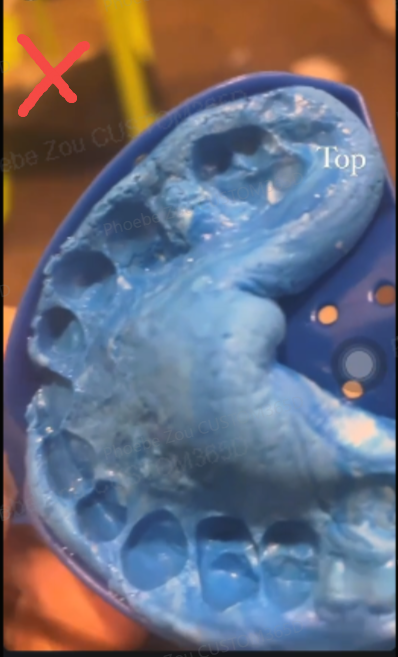
Case 3: The lower teeth are chipped because they are placed too far into the mouth when biting. The teeth should be kept in the middle of the material.
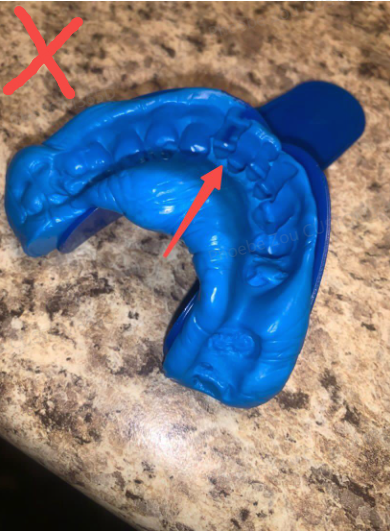
Case 4: The bite is too shallow
7: how to do if didn’t get correct mold
Pls make sure make dental impressions as better as you can, after we checked and found if the mold can’t be use, there the other solution way like this
1: we can ship the other kits for you to do again. But you need to pay $100 for material and shipping fee
2: you can make a appointment with dentist to get the tooth mold file and email to us, it will be more convenient
3: you can buy 2 sets of mold kits from amazon or other shops
8: Let’s begin to do it according to below video